
6 Step Sand Filter Maintenance Checklist With Cheat Sheet!
Table of Contents
Sand Filter Maintenance Checklist For Pool Opening
Looking forward to the pool season? Make sure the pool filter is in good shape! This Sand Filter Maintenance Checklist will put you on the right track.
Lounging in the sun, splashing around with family and friends, and soaking up the good times; these are the joys of a backyard pool! But owning a pool comes with its share of responsibilities. Going through the sand filter maintenance checklist is one of them!
To make life a bit easier for you, I have prepared a comprehensive sand filter maintenance checklist that’s easy to follow and especially helpful at pool opening time.
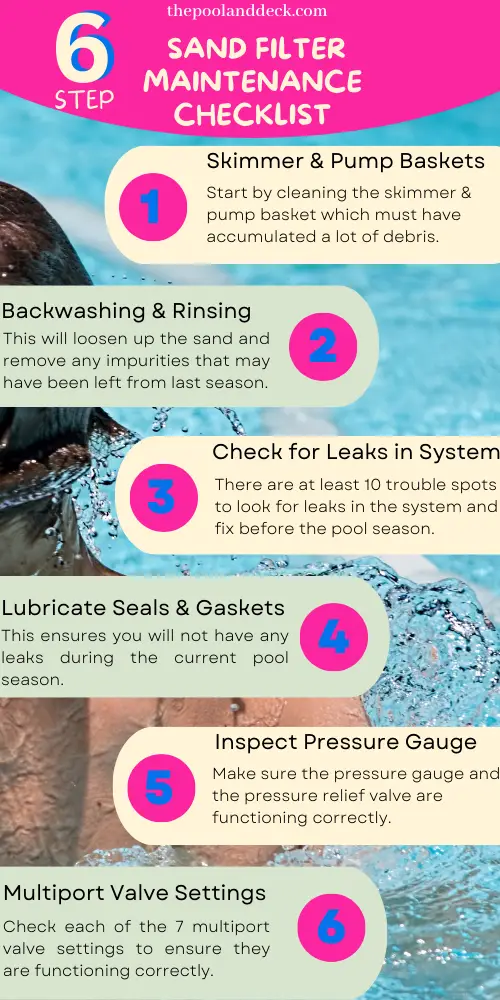
I shall walk you through the 6 steps, as under:
- Cleaning the Skimmer & Pump Baskets
- Backwashing and Rinsing the Sand Filter
- Checking for Leaks in the Filtration System
- Lubricating O-rings and Gaskets
- Inspecting the Pressure Gauge and Pressure Relief Valve
- Checking the Functioning of MPV Settings
Moreover, I have included a handy cheat sheet at the end that summarizes all the key points and is great as a quick reference, whenever you need to.
Cleaning the Skimmer & Pump Baskets
The pool filter traps the finer debris and contaminants. For example a sand filter has the capacity of trapping particles ranging from 5 microns to 20 microns depending on whether you are using recycled glass, zeolite or silica sand as a filter media.
However, the skimmer basket and the pool basket are your first line of defense. The pool skimmer basket will trap larger debris such as leaves and twigs. Smaller debris may pass through the piping and end up in the pump basket.
Begin by cleaning the skimmer and pump baskets at the start of the pool season because during the offseason, debris, such as leaves, dirt, and insects, can accumulate in the baskets and become compacted, causing them to clog.
Clogged baskets can cause the pump to work harder and decrease its lifespan. Additionally, they can impede water flow and decrease the turnover rate, leading to inadequate filtration.
To clean the skimmer and pump basket, make sure the pump is turned off.
Cleaning the Skimmer Basket
- Remove the skimmer lid by pulling it upward.
- Inspect the skimmer basket and remove any debris or leaves that may have accumulated over the winter.
- If the basket is cracked or damaged, replace it before using the skimmer.
- Rinse & clean the skimmer basket using a garden hose. If the basket is particularly dirty, you can also use a mild detergent or cleaner.
- Reinstall the skimmer lid and make sure it’s securely fastened.
Cleaning the Pump Basket
- Remove the pump lid by twisting it counterclockwise. Be careful not to lose the O-ring or gasket, which helps create a tight seal.
- Inspect and remove any debris or leaves that may have accumulated over the winter.
- If the pump basket is cracked or damaged, it should be replaced before using the pump.
- Rinse & clean the pump basket using a garden hose. If the basket is particularly dirty, you can also use a mild detergent or cleaner.
- Reinstall the pump lid and make sure it’s securely fastened.
Backwashing and Rinsing the Sand Filter
The sand inside the sand filter has not been in active use for the entire winter. It has most likely coagulated or formed lumps. It may also have collected some dust.
Backwashing and rinsing the sand filter will loosen up the sand and remove the impurities. Here is how you do it.
- Connect the backwash hose to waste.
- Turn the setting on the Multiport Valve to Backwash.
- Turn on the pool pump and run for 2 – 3 minutes.
- Turn off the pump and change the Multiport Valve setting to Rinse
- Turn on the pump and run for 30 seconds. This will flush out any remaining debris and dirt from the sand filter.
- Turn off the pump.
Now change the setting on the multiport valve to Filter and turn on the pump. Check the Pressure Gauge. If the pressure reading is in the normal range the condition of the sand in the filter is good for this season.
However, if the pressure remains around 10 psi above normal then it is an indication that you might have to change the sand in the sand filter. Repeat the backwashing and rinsing process but after using a pool sand filter cleaner, before coming to a conclusion.
Check out my earlier post How To Change Pool Filter Sand? (An Easy 10 Step Guide!) for detailed instructions.
As an Amazon Associate, I earn from qualifying purchases.
Checking for Leaks in the Filtration System
The first backwash and rinse of the season is also the perfect time to check for leaks in the filtration system. As the sand filter and its surroundings would be completely dry to begin with, it will be easy to see any major leaks.
Check for minor leaks by running your dry hand or a tissue paper over the joints which are most likely to leak. Here is a list of spots to check:
- Filter Tank Body
- Filter Tank Seal
- O-Rings
- Air Relief Valve
- Pressure Gauge
- Drain Plug
- Pump Shaft Seal
- Multiport Valve (MPV) Spider Gasket
- Pool Heater
- Pipes & Valves
For a detailed remedial action plan check out my earlier blog post Pool Filter Leaking: 10 Trouble Spots to Look For & Fix!
Lubricating O-rings and Gaskets
Even if the O-rings and gaskets of your sand filtration system are not leaking, they are sure to have become dry & brittle. O-rings and gaskets are typically made from synthetic rubber which has poor resistance to pool chemicals, UV light and low temperatures.I highly recommend lubricating the O-rings and gaskets of the filtration system with a lube such as Lube Tube.
Here is how to do it:
- Turn off the pool pump.
- Get access to the O-rings and gaskets by removing clamps or screws as required.
- Clean the O-rings and gaskets with a soft cloth or sponge to remove any dirt or debris.
- Apply a small amount of “Lube Tube” lubricant to the O-rings and gaskets. Be careful not to use too much, as this can cause the O-rings and gaskets to slip out of place.
- Gently rub the lubricant into the O-rings and gaskets with your fingers to ensure that it is evenly distributed.
- Place back the O-rings and gaskets in their slots or positions.
- Turn the pool equipment back on and check for any leaks.
- If you notice any leaks, turn off the equipment and check to make sure that the O-rings and gaskets are properly seated and lubricated.
Inspecting the Pressure Gauge and Pressure Relief Valve
Pressure gauge and pressure relief valve are two critical parts of the pool filtration system that must be inspected at the start of each pool season. Here are the steps you should follow:
- Turn off the pool pump.
- The pressure gauge is typically located on the filter tank or pump, and the pressure relief valve is usually located on the filter tank. Refer to your owner’s manual if you’re not sure where they are located.
- Take a look at the pressure gauge and ensure that the needle is within the appropriate range. If the pressure is too high or too low, it could indicate an issue with the pool system, such as a dirty filter or a clogged pump.
- Test the pressure relief valve. Lift the lever on top of the valve and allow some water to escape. If water flows freely, the valve is working correctly. If the valve is clogged or doesn’t release water, it needs to be replaced.
- Clean the pressure gauge and pressure relief valve using a soft cloth and mild detergent or cleaner.
- Replace damaged or malfunctioning parts, if any.
- Turn on the pump.
Checking the Functioning of MPV Settings
The Multiport Valve (MPV) sits on top (or on the side in some models) of the filter tank. It has three external “ports”. Hence the term “multiport” in the name. The ports are:
- INLET through which unfiltered water from the pool enters the filter pushed by the pool pump.
- RETURN directs the filtered (or at times, just the recirculated) water back to the pool through return line and jets.
- WASTE connects to a drain through fixed plumbing or a simple flexible hose.
The pool multiport valve has 7 settings as under:
- FILTER
- BACKWASH
- RINSE
- WASTE
- RECIRCULATE
- CLOSED
- WINTER
To complete your Sand Filter Maintenance Checklist, it is best to test each of the multiport valve settings and ensure that they are in good working condition.
Bottom Line
Please make sure to test the key components of the pool filtration system before you start using your pool in spring as per the Sand Filter Maintenance Checklist in the cheat sheet below:
Thank you very much for reading the post. I do hope you found it informative and helpful.